How To Move Installed Programs To Another Drive In Windows 10
In this guide, we will see how to move installed programs to another drive or partition in Windows 10.
As you likely know, Windows 10 allows users move installed apps but it doesn’t allow moving traditional programs (only apps installed from the Store are supported).
Steam Mover to move installed programs to another drive
Steam Mover is a free program designed to help PC users move installed programs from the default location to another folder or drive. The Steam Mover software relocates installed programs in a few seconds without any issues. You just need to select the program that you want to move and then choose the new location. As simple as that.
If you’re not sure how to use the Steam Mover to move installed applications from another drive in Windows 10, complete the given below directions.
Relocate installed programs to another partition in Windows 10
WARNING: Since Windows 10 doesn’t support moving installed desktop programs unlike apps, we recommend you backup all data and create a system image backup just to be on the safer side. We are not responsible for any data loss or system crash.
NOTE: This method can’t be used to move installed programs to flash drive or any other kind of USB external drive.
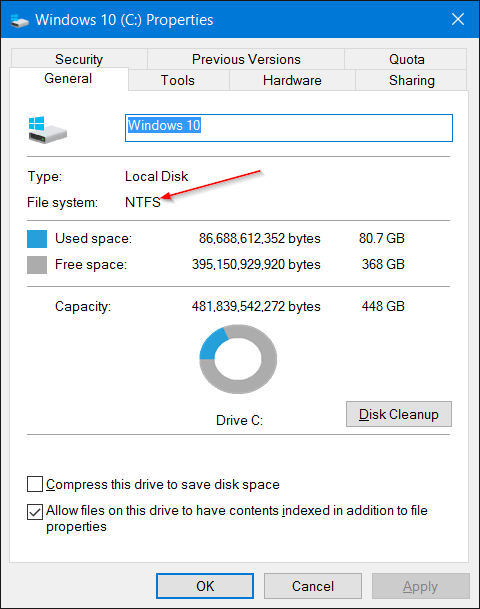
Step 1: Since Steam Mover relocates programs by creating junction points, this method, in fact the program, doesn’t work on FAT32 formatted drives. So the first step is to make sure that the drive where Windows 10 is installed as well as the drive where you plan to move installed programs are formatted with NTFS before you begin.
To check the type of the file system, right-click on the drive, select Properties, and then check the file system type.

Step 2: Download Steam Mover software. The program has not been updated over 5 years but the software works great on Windows 10 as well. We have tried this software on both 32-bit and 64-bit Windows 10 install without any issues.
Extract the downloaded zip file to get SteamMover executable file.
Step 3: Right-click on the SteamMover executable file and then click Run as administrator option to launch the program with admin privileges.

Step 4: Upon launching SteamMover, it will not list all installed programs. Under Steam apps common folder section, click the small button labelled … and then browse to Program files folder containing your installed programs. If you are running 64-bit type of Windows 10, the program that you want to move might be located under Program Files (x86) folder.


Select either Program files or Program Files (x86) to list installed programs. If the program that you’re planning to move is not appearing upon selecting Programs Files (x86), select Program Files folder.
Step 5: From the list, select the program that you want to move, click the dotted button under Alternative folder to select the new location where you want to move the program to and finally, click the large right-arrow button located at the bottom of the program to begin moving the program.

You will see Command Prompt window for a few seconds, indicating that the selected program is being moved.
If everything goes well, the program will be moved in a couple of seconds.

You can now navigate to the new location to see moved program(s).

Note that you can move multiple programs at a time by selecting all programs that you want to move. That said, we advise you move a program first just to make sure that the moved program works before moving other programs.
To reverse the move, select programs that have been moved, and then click the large left arrow button.

That's it. Try out this trick today itself. Hope you had fun reading the article.


Comments
Post a Comment