How To Adjust Volume For Individual Applications In Windows 10
Moving on is always hard, especially if it’s from something that we’ve been very fond of. As Windows made it’s way to its users’ hearts, its features also found some special places to stay safe. One of those features is the Windows volume controller. In the previous Windows versions, users could freely adjust volume settings for individual applications by just clicking on the Speaker icon and then on the Mixer link.
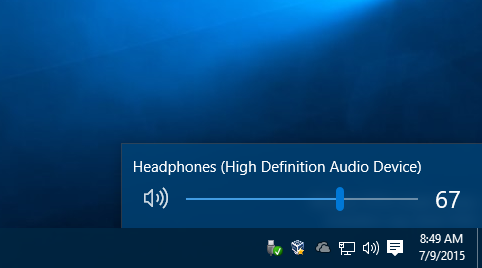
But if you click on the Speaker icon in Windows 10, this is what you get:

Yes, there is no Mixer link available. Does it mean that you cannod adjust volume settings of individual applications? Do you think Windows would do that to you? Definitely not. Simply right click on the Speaker icon and then on Open Volume Mixer.

Yeah, there it is! Your volume mixer all so cool and happy. Now you can easily adjust volume settings for individual applications like you used to do it before.

But some of us might find it a bit heart-breaking. To let go of something that was so close to our heart. How about having our Mixer back in its old position? It’s no big deal. You just got to make a couple of registry changes. Read on, to learn how to hack this simple trick.
Solution 1 – By Changing Registry Editors
STEP 1
Since we need to make some changes to our registry editors, let’s get our regedit program up and running first. For that, simply type in regedit to your Cortana search box and hit Enter. From the search results, click on regedit program as shown in the screenshot.

STEP 2
Now the window for Registry Editor opens up. You need to navigate to the following path. For that, first click on HKEY_LOCAL_MACHINE. Refer to the following screenshot in case you face any difficulties.
HKEY_LOCAL_MACHINE\Software\Microsoft\Windows NT\CurrentVersion\MTCUVC

STEP 3
From the expanded menu, choose the option named Software. And then you need to click on Microsoft, then on Windows NT and then on CurrentVersion.

STEP 4
Now from the list of options that are under CurrentVersion key, look for the one named MTCUVC. Click on it to get to the next step.

STEP 5
In the right window pane, you need to find a DWORD value named EnableMtcUvc. If its not already there, simply create one. For that, right click on the right window pane, then on New and then on DWORD (32-bit) value.

STEP 6
Entitle the newly created DWORD value as EnableMtcUvc.

STEP 7
Doube click on the newly created DWORD entry to change its Value data. It will be 1 by default. Change it to 0 as shown in the screenshot. Click on OK button when you are all done. That’s it.

STEP 8
Now if you click on your volume icon in the task bar, you will be able to see that your old friend is back! Simply click on Mixer as shown in the screenshot to adjust volume settings of individual applications.

Solution 2 – By Using Ear Trumpet : A Free Open Source Tool
Ear Trumpet is a free open source tool that can be used to adjust volume settings of individual applications in Windows 10. It has got a pretty simple user interface. You can get Ear Trumpet from here.

That’s it. Now you can easily manage volume settings for individual applications with these simple steps. Hope you found the article useful.


Comments
Post a Comment