How to Move / Show “Details Pane” at Top in Windows Vista and 7 Explorer?
If you can remember the good old Longhorn days when Windows Vista was under Beta testing, the Details Pane in Windows Explorer used to show at top just below the Command Bar. But in Windows Vista RTM (Final version), the Details Pane was moved to bottom. Same thing applies to Windows 7 as well.
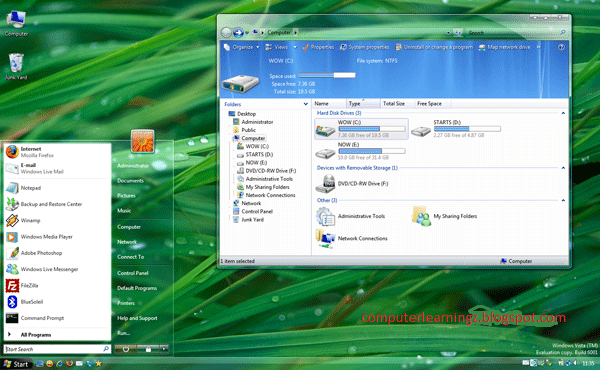
There are many people who still want to get the Details Pane at top as shown in below picture:
You can also change the "Details Pane" position from Bottom to Top in Windows Vista and 7 Explorer using following simple steps:
1. We'll have to edit "%windir%\System32\Shell32.dll" file. First copy Shell32.dll file from "System32" folder to some other location for example Desktop.
Note: here %windir% represents "Windows" directory which can be found in the system drive where Windows is installed. In most of the cases its C:\Windows.
2. Now open the new file in Resource Hacker.
3. Go to "View -> Find Text" (or press Ctrl + F). It'll open Find box.
4. Now type following String in textbox:
5. Click on "Find Next" button and it'll show the line containing this text. It should be in UIFILE section.
6. You have to just replace "bottom" word with "top".
7. When you have done, click on "Compile Script" button.
8. Now press "F3" key and it'll show the next line containing the same text. Again do the same mentioned in 6th step.
9. Remember! You have to replace "bottom" word with "top" only in following locations (i.e. keys under UIFILE section):
10. If you also want to show the Details Pane at Top in Browse/Save/Open dialog boxes, then replace "bottom" word with "top" in 27 and 28 keys too.
11. That's it. You have done. Now save the file.
12. Now we'll need to replace original Shell32.dll file present in "C:\Windows\System32\" folder with our new Shell32.dll file which we saved at Desktop or some other location.
12 a. First take ownership of "C:\Windows\System32\Shell32.dll" file
12 b. Now rename it to "shell32_backup.dll" or any other name.
12 c. Now copy your new modified "shell32.dll" file from Desktop to "System32" folder.
PS. If you are using 64-bit Windows edition, you'll also need to replace Shell32.dll file present in "C:\Windows\sysWOW64\" folder with new one.
13. Restart your system and after restart Windows will start using your new modified file and you'll get details pane at Top.
There are many people who still want to get the Details Pane at top as shown in below picture:
You can also change the "Details Pane" position from Bottom to Top in Windows Vista and 7 Explorer using following simple steps:
1. We'll have to edit "%windir%\System32\Shell32.dll" file. First copy Shell32.dll file from "System32" folder to some other location for example Desktop.
Note: here %windir% represents "Windows" directory which can be found in the system drive where Windows is installed. In most of the cases its C:\Windows.
2. Now open the new file in Resource Hacker.
3. Go to "View -> Find Text" (or press Ctrl + F). It'll open Find box.
4. Now type following String in textbox:
layoutpos="bottom"
5. Click on "Find Next" button and it'll show the line containing this text. It should be in UIFILE section.
6. You have to just replace "bottom" word with "top".
7. When you have done, click on "Compile Script" button.
8. Now press "F3" key and it'll show the next line containing the same text. Again do the same mentioned in 6th step.
9. Remember! You have to replace "bottom" word with "top" only in following locations (i.e. keys under UIFILE section):
3, 4, 5, 6, 19, 20, 21
10. If you also want to show the Details Pane at Top in Browse/Save/Open dialog boxes, then replace "bottom" word with "top" in 27 and 28 keys too.
11. That's it. You have done. Now save the file.
12. Now we'll need to replace original Shell32.dll file present in "C:\Windows\System32\" folder with our new Shell32.dll file which we saved at Desktop or some other location.
12 a. First take ownership of "C:\Windows\System32\Shell32.dll" file
12 b. Now rename it to "shell32_backup.dll" or any other name.
12 c. Now copy your new modified "shell32.dll" file from Desktop to "System32" folder.
PS. If you are using 64-bit Windows edition, you'll also need to replace Shell32.dll file present in "C:\Windows\sysWOW64\" folder with new one.
13. Restart your system and after restart Windows will start using your new modified file and you'll get details pane at Top.


Comments
Post a Comment